
WANT TO SAVE THIS RECIPE?
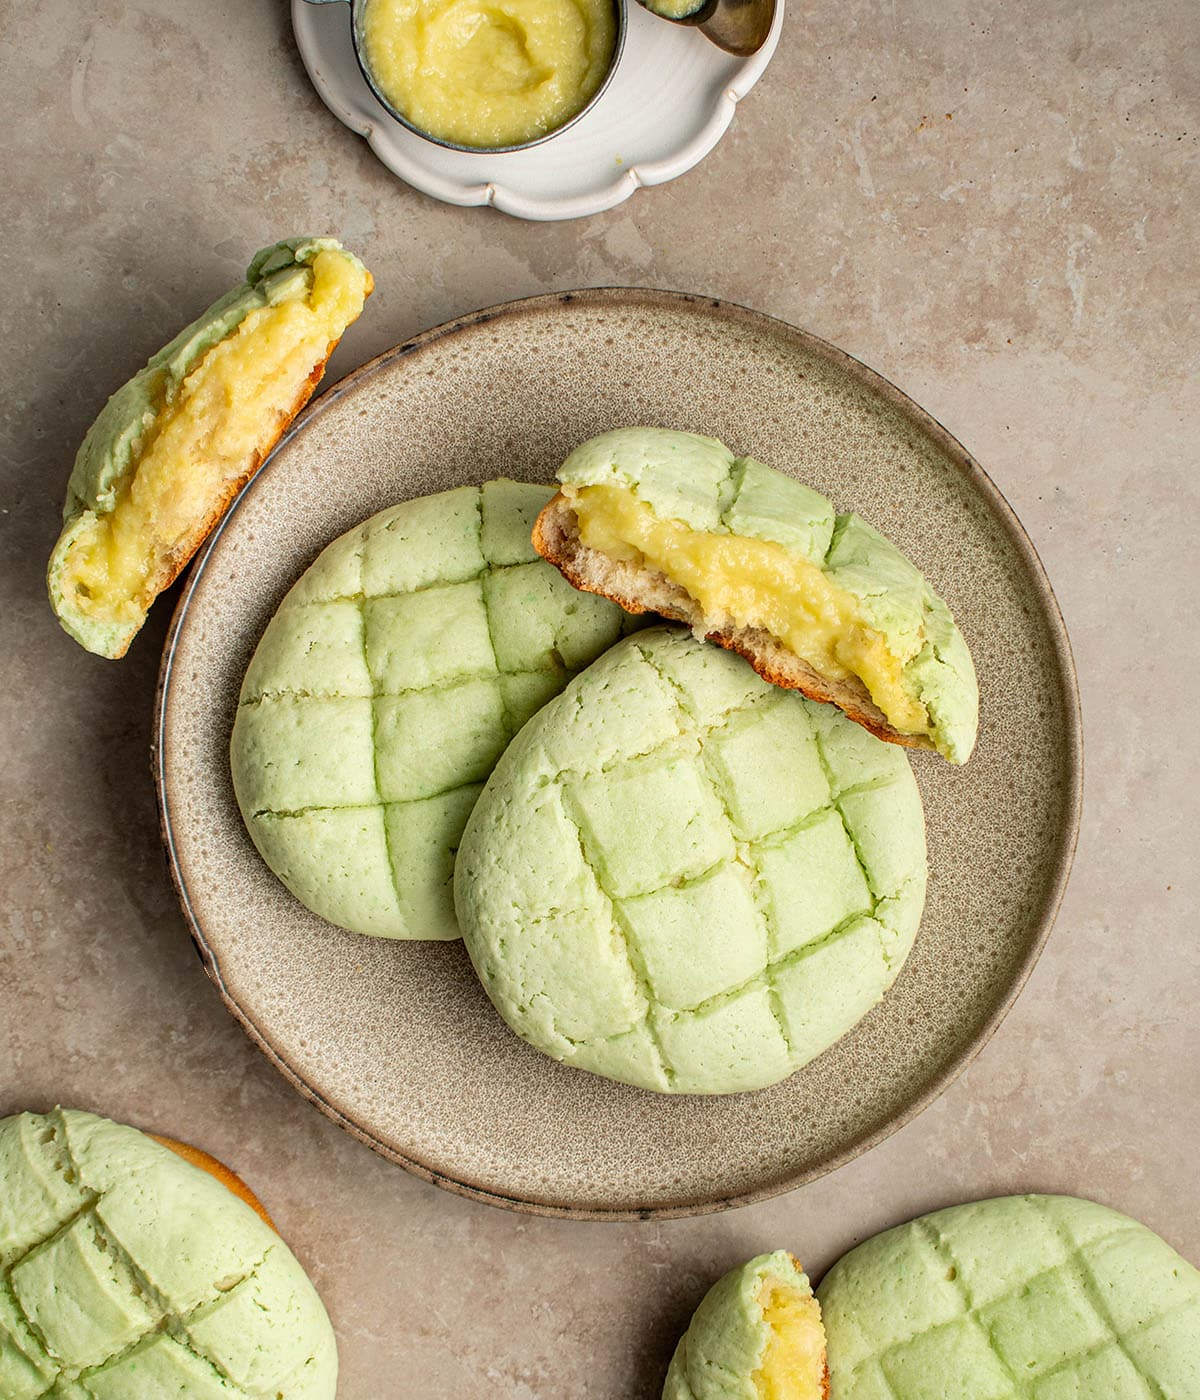
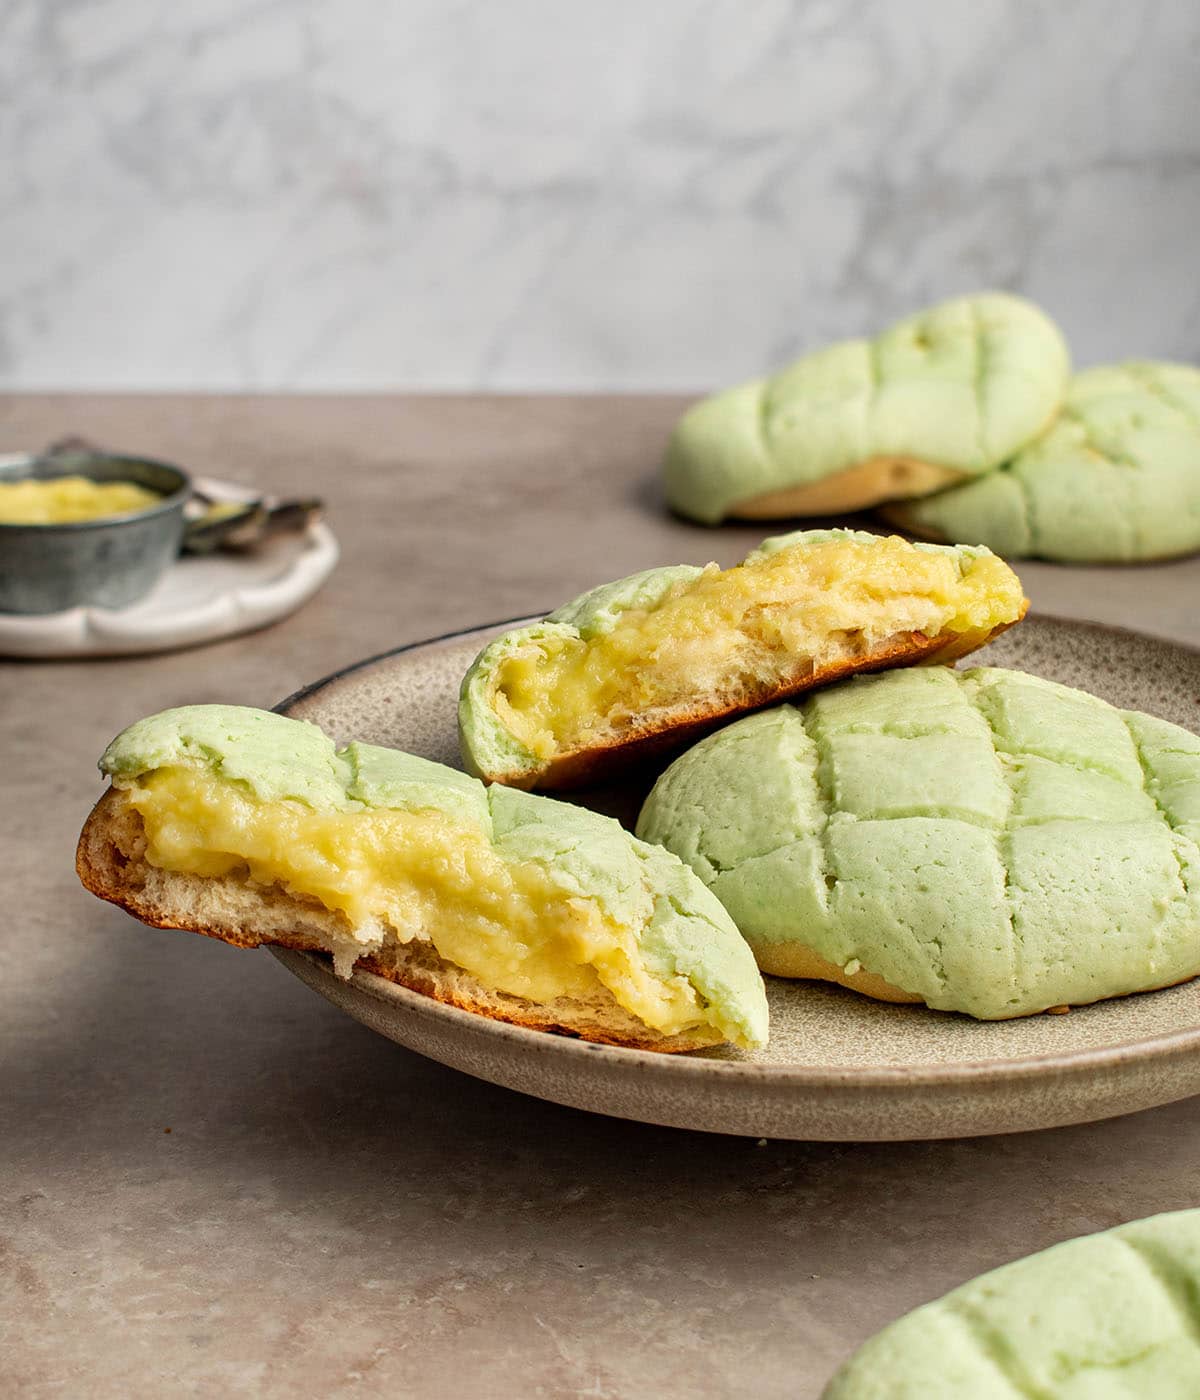
Japanese honeydew bread looks like a melon pan but unlike a melon pan, it tastes like melon! Filled with homemade honeydew custard and baked until golden brown with a crunchy honeydew crust.


Jump to:
Watch how to make this
What makes this recipe special
The first time I visited Japan, I made it my goal to eat as many dishes as I could. I had an entire list to tackle with only two weeks. Needless to say, I wasn't able to try everything I wanted but I did discover many new favorites including Japanese pancakes, egg onigiri, and Japanese honeydew bread.
This bread was nothing like I'd had before. They looked like melon pan but unlike melon pan, they actually tasted like melon. Coated in a sugar topping, the soft pastry is filled with a honeydew custard. It was amazing. Years later, here I am still thinking about that bread. And so, here is my version of the Japanese bread, honeydew bread in all its glory!
Ingredients
- Active dry yeast: When using active dry yeast, you need to activate it first by combining it with warm milk and a pinch of sugar. If using instant yeast, you can skip this step. However, make sure that you are still using warm milk for the dough.
- Milk: To create soft bread, we're going to incorporate milk, egg, and butter into the dough. These ingredients all contribute to the soft texture while adding richness.
- Bread flour: This specific flour has a higher protein content giving the bread a stronger gluten structure and as a result, better rise. It also yields fluffier bread as opposed to all-purpose flour.
- Honeydew melon: This type of melon has a sweet and mild flavor with a refreshing taste. You can also substitute honeydew with cantaloupe if you prefer.
- Cornstarch: The thickening agent helps the honeydew custard reach the right consistency.
- Cake flour: The texture of cake flour is very fine and powdery with a low protein content, making it the perfect flour to make the bread topping.
- Green food coloring: Although optional, green food coloring helps make the bread look more like honeydew. Since the fruit turns yellow when cooked, the food coloring helps achieve the correct appearance.
Step-by-step instructions
Step 1: Cook honeydew syrup
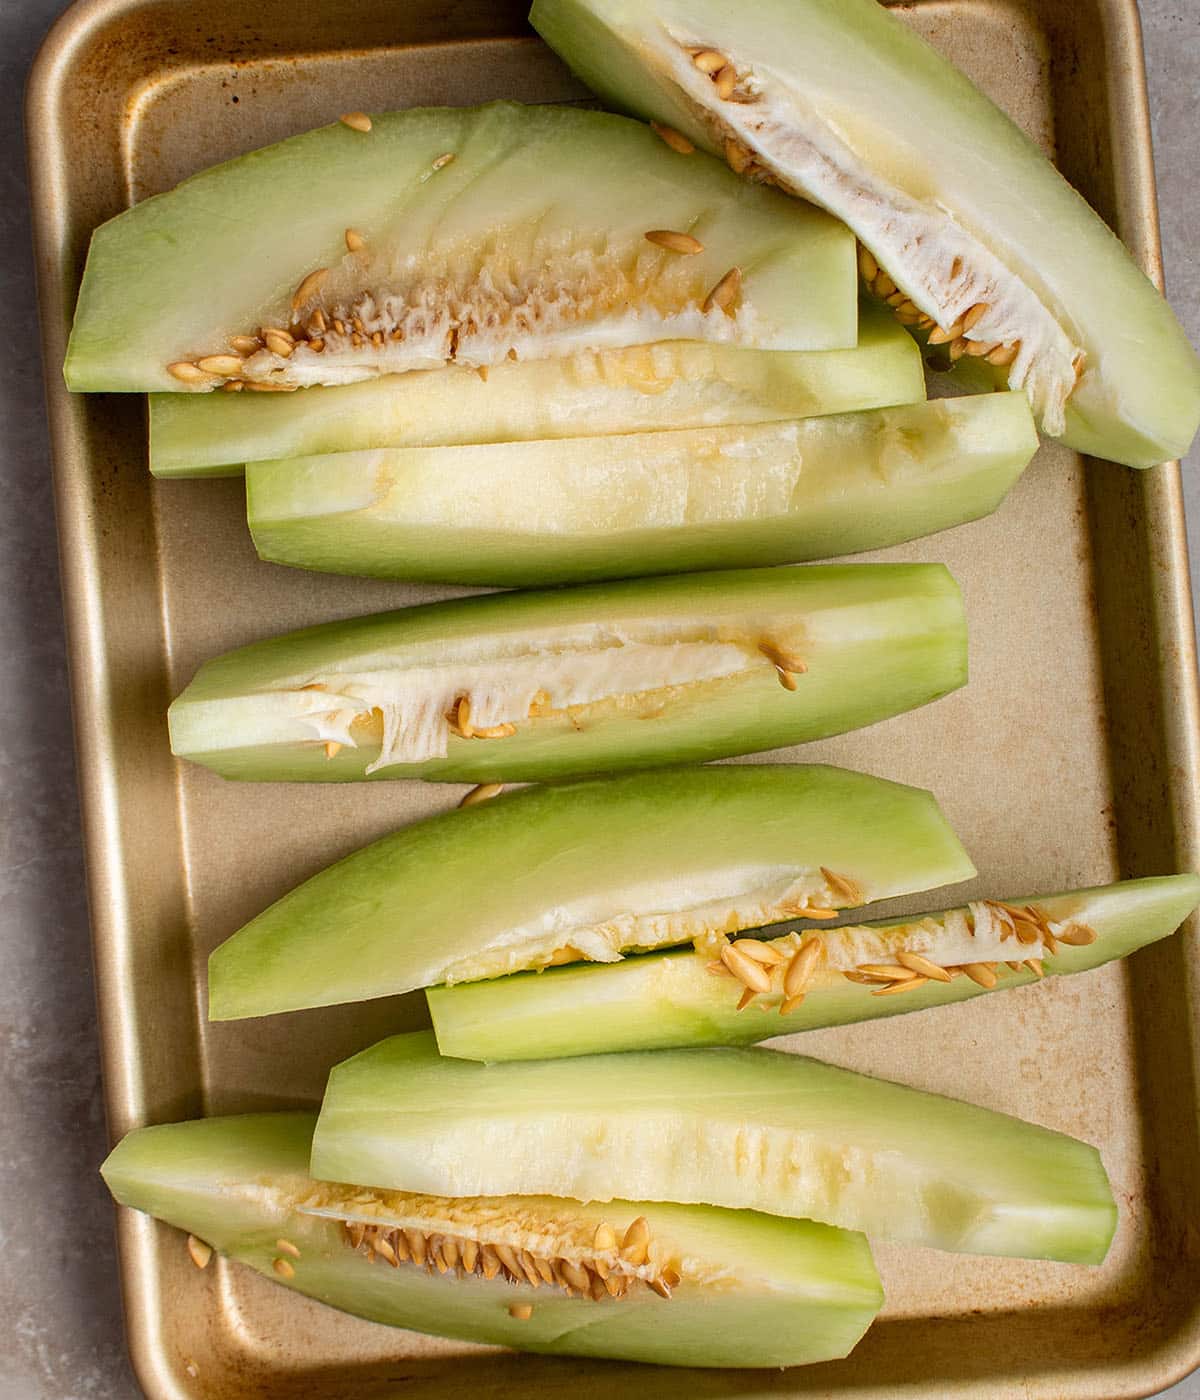
Let's dive right in shall we? Before we can even start making the bread, we have to make the main flavor component, the honeydew syrup. If you can find honeydew syrup that doesn't taste artificial, by all means, go for it. I was unable to find any so I went the natural route and decided to make it myself.
All you have to do is puree 2 cups of fresh honeydew in a blender and simmer it with a bit of sugar until it is reduced by half. If your honeydew is already very sweet, you can reduce the amount of sugar or omit it altogether.
About 20 minutes later, the honeydew syrup should be slightly thickened, darker, and more concentrated in flavor. We're going to use this syrup for both the custard and the bread topping.
Step 2: Make the dough
Now it's time to make the dough. First, activate the yeast with a bit of sugar in warm milk. Then, add the remaining ingredients including the bread flour, salt, sugar, softened butter, and egg. Knead the dough until smooth; the dough will be soft but that just means the actual bread will be too! I use the stand mixer to prepare the dough but you can knead it by hand if you prefer.
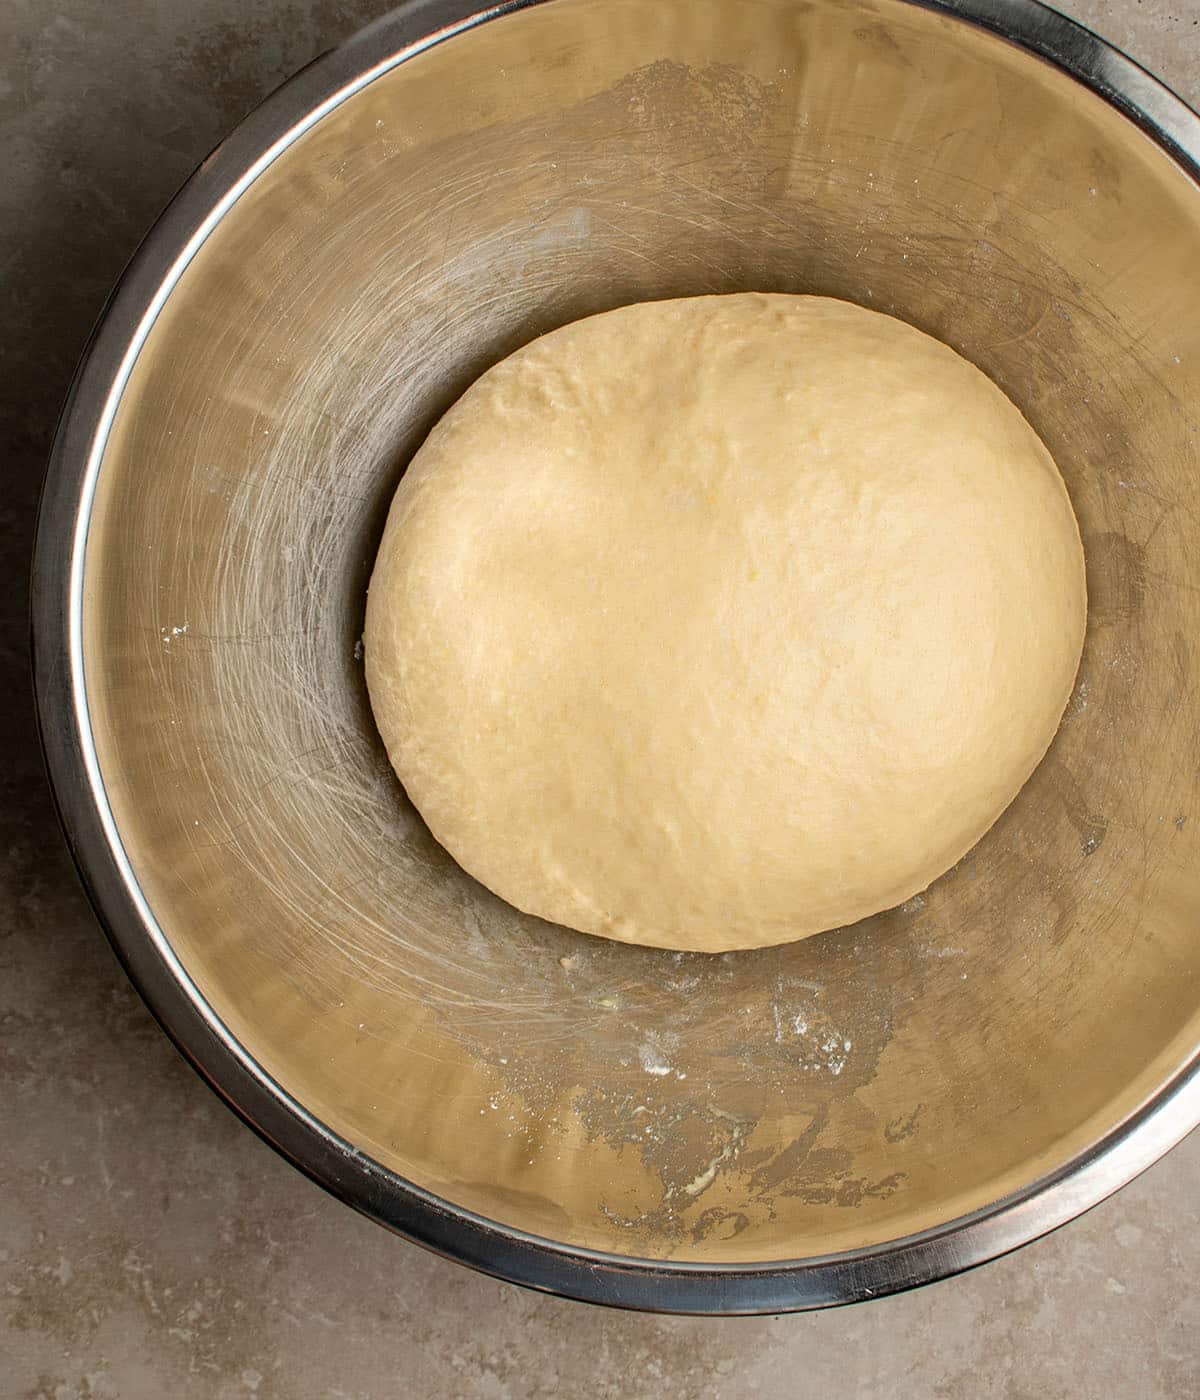
Proof the dough for about 1 hour or until it has doubled in size. If it's a particularly hot day, this may take less than 1 hour.
Step 3: Prepare honeydew custard
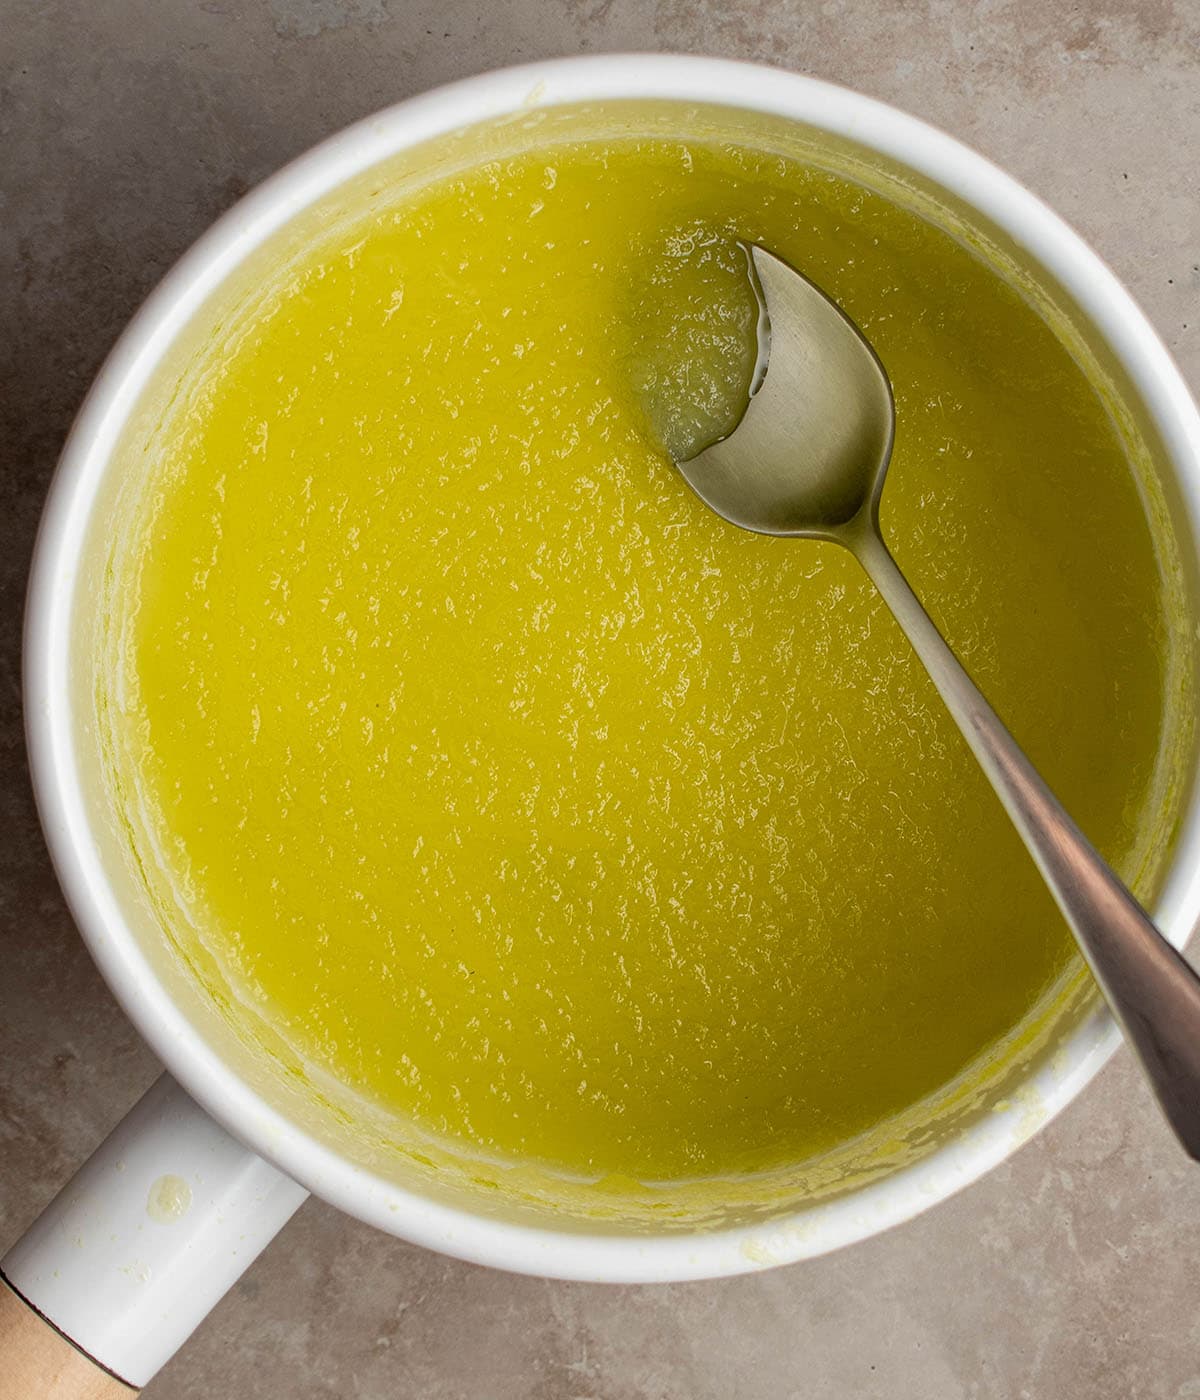
Meanwhile, make the honeydew custard, which will fill the bread. Puree about 2 ¼ cups of honeydew to yield 1 ½ cups of fresh juice. Then, combine the juice with eggs, sugar, cornstarch, vanilla, and ¼ cup of the honeydew syrup we prepared.
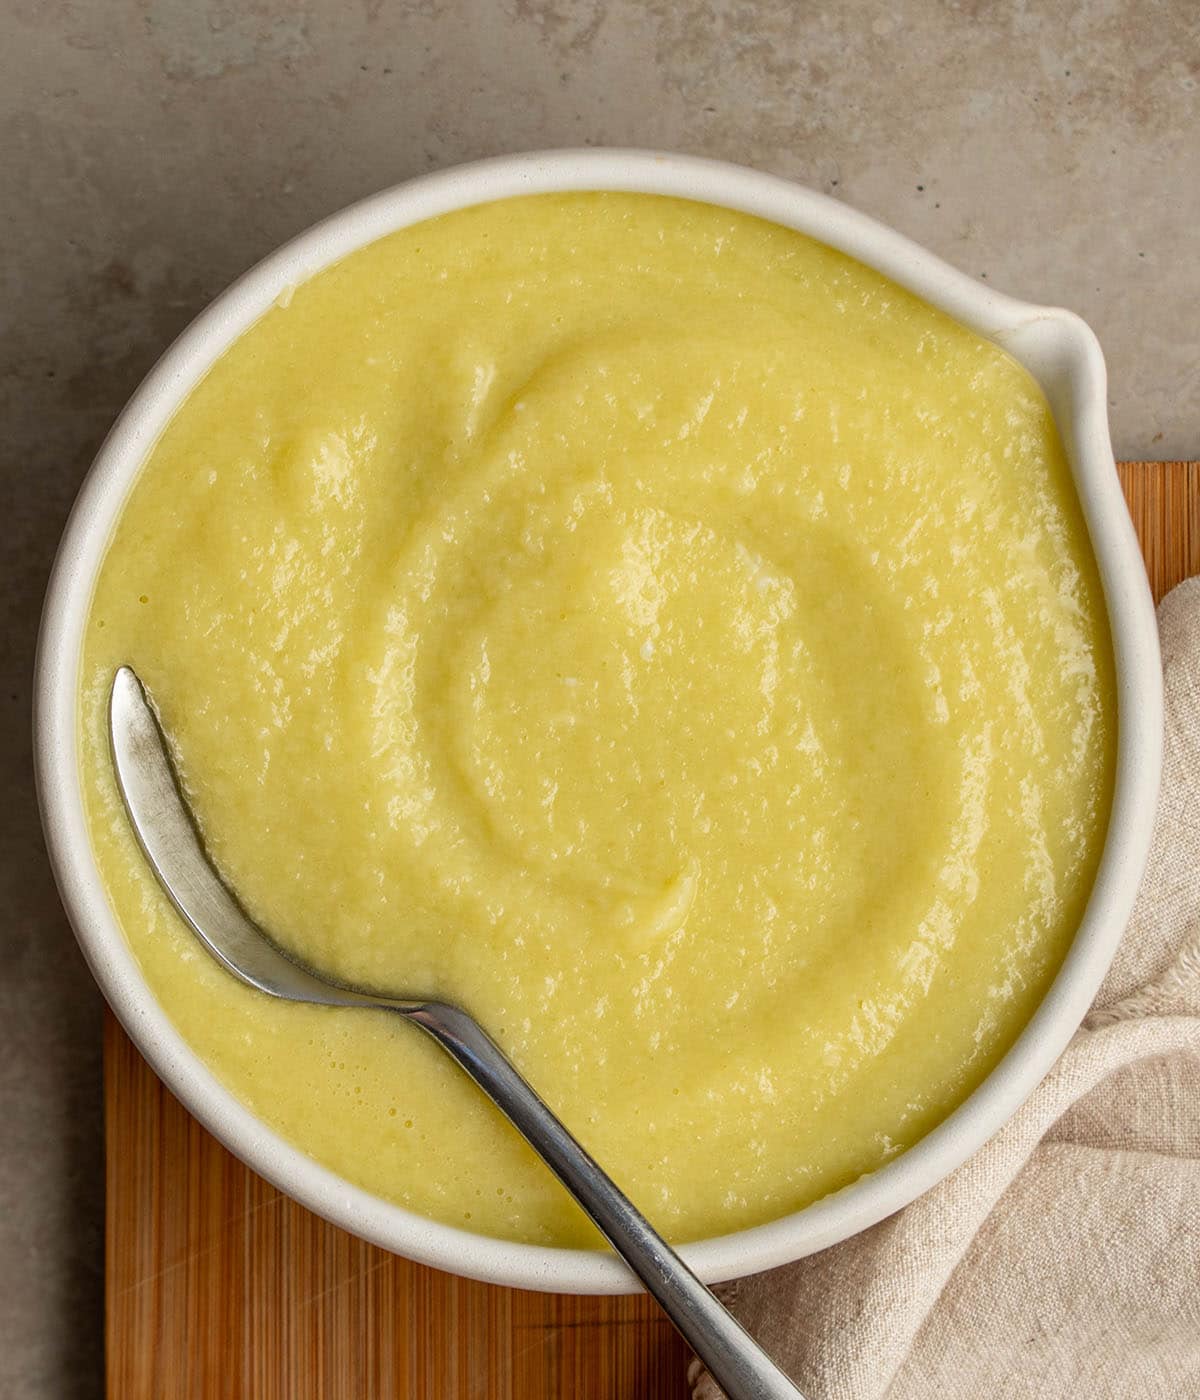
Simmer the mixture over medium heat, whisking continuously to prevent the egg from curdling. Once the custard starts to thicken, take it off the heat and pour it into a clean bowl. Place plastic wrap directly on top of the custard to prevent the skin from forming and let it cool completely.
Step 4: Fill the bread
Once the dough is ready, punch it down and divide it into 8 equal portions. Roll out each portion into a 6-inch circle and fill the center with the custard. If you're able to successfully stuff more custard in the rolls, kudos to you! I found it a little tricky to close the seams when I put too much filling.

Place the rolls seam side facing down on a baking sheet and lightly cover the rolls. Proof the bread once more for another hour.
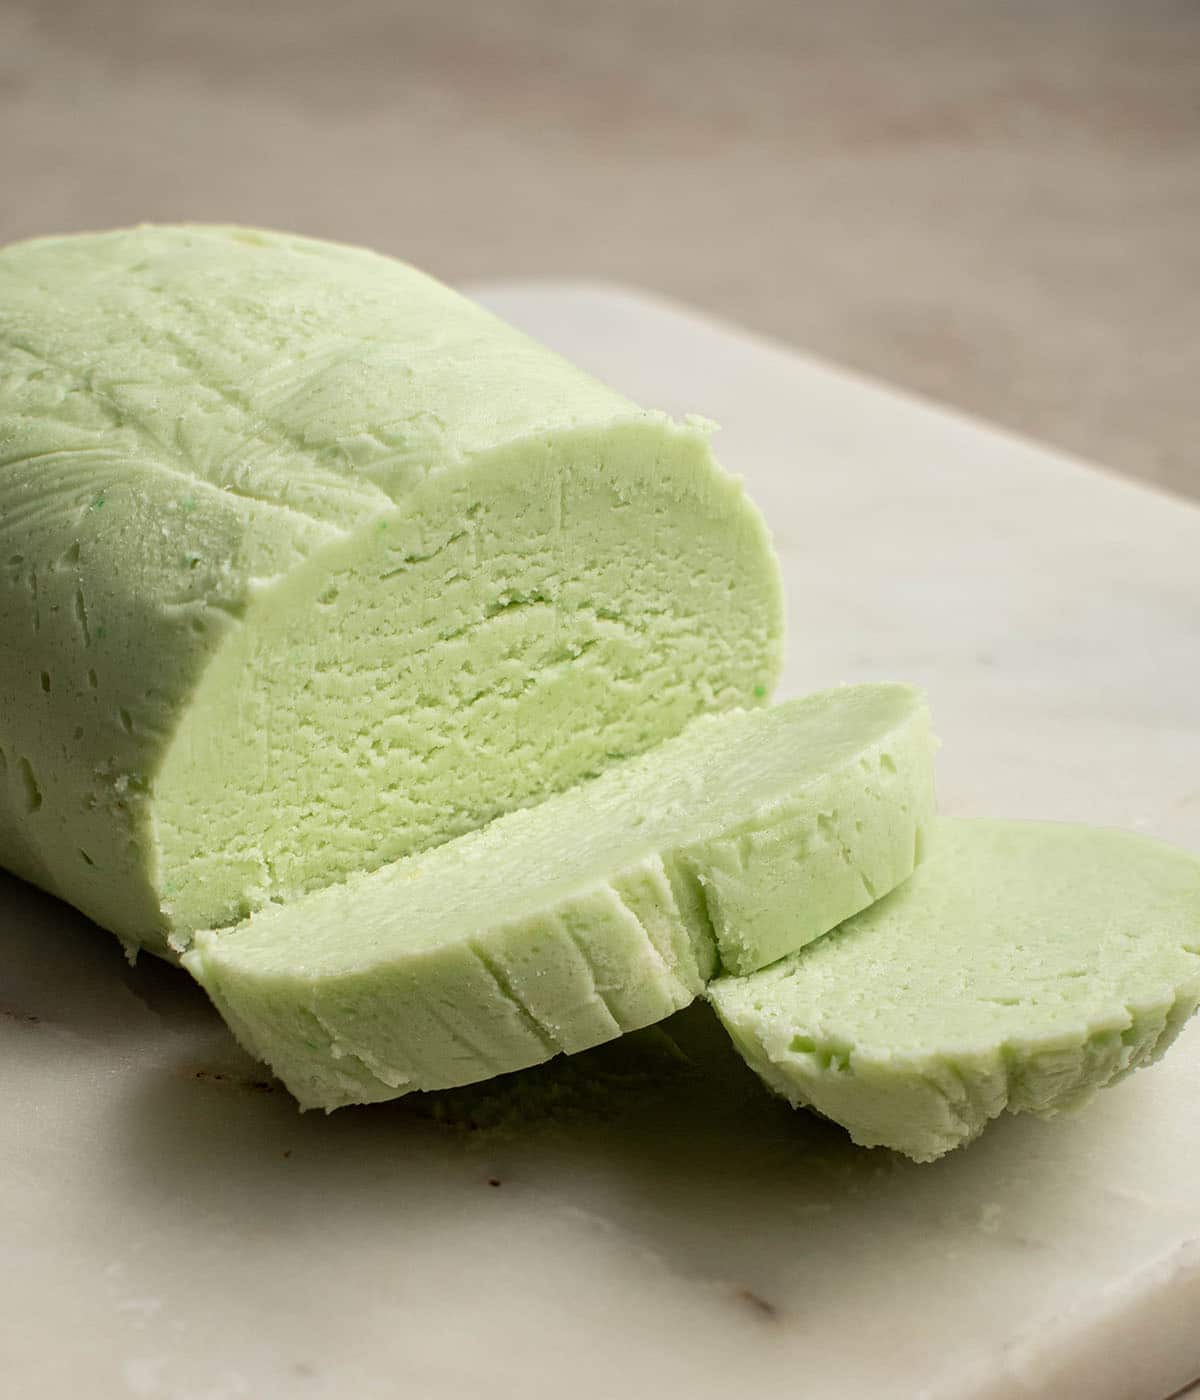
While the bread is rising, make the bread topping. To make the topping, cream together butter with sugar until light and fluffy. Add an egg followed by honeydew syrup, cake flour, baking powder, and 1 drop of green food coloring.
The food coloring is optional but it adds a lovely green tint. No matter what I tried, I couldn't get it the same green with just natural honeydew juice so food coloring it is!
Step 5: Bake
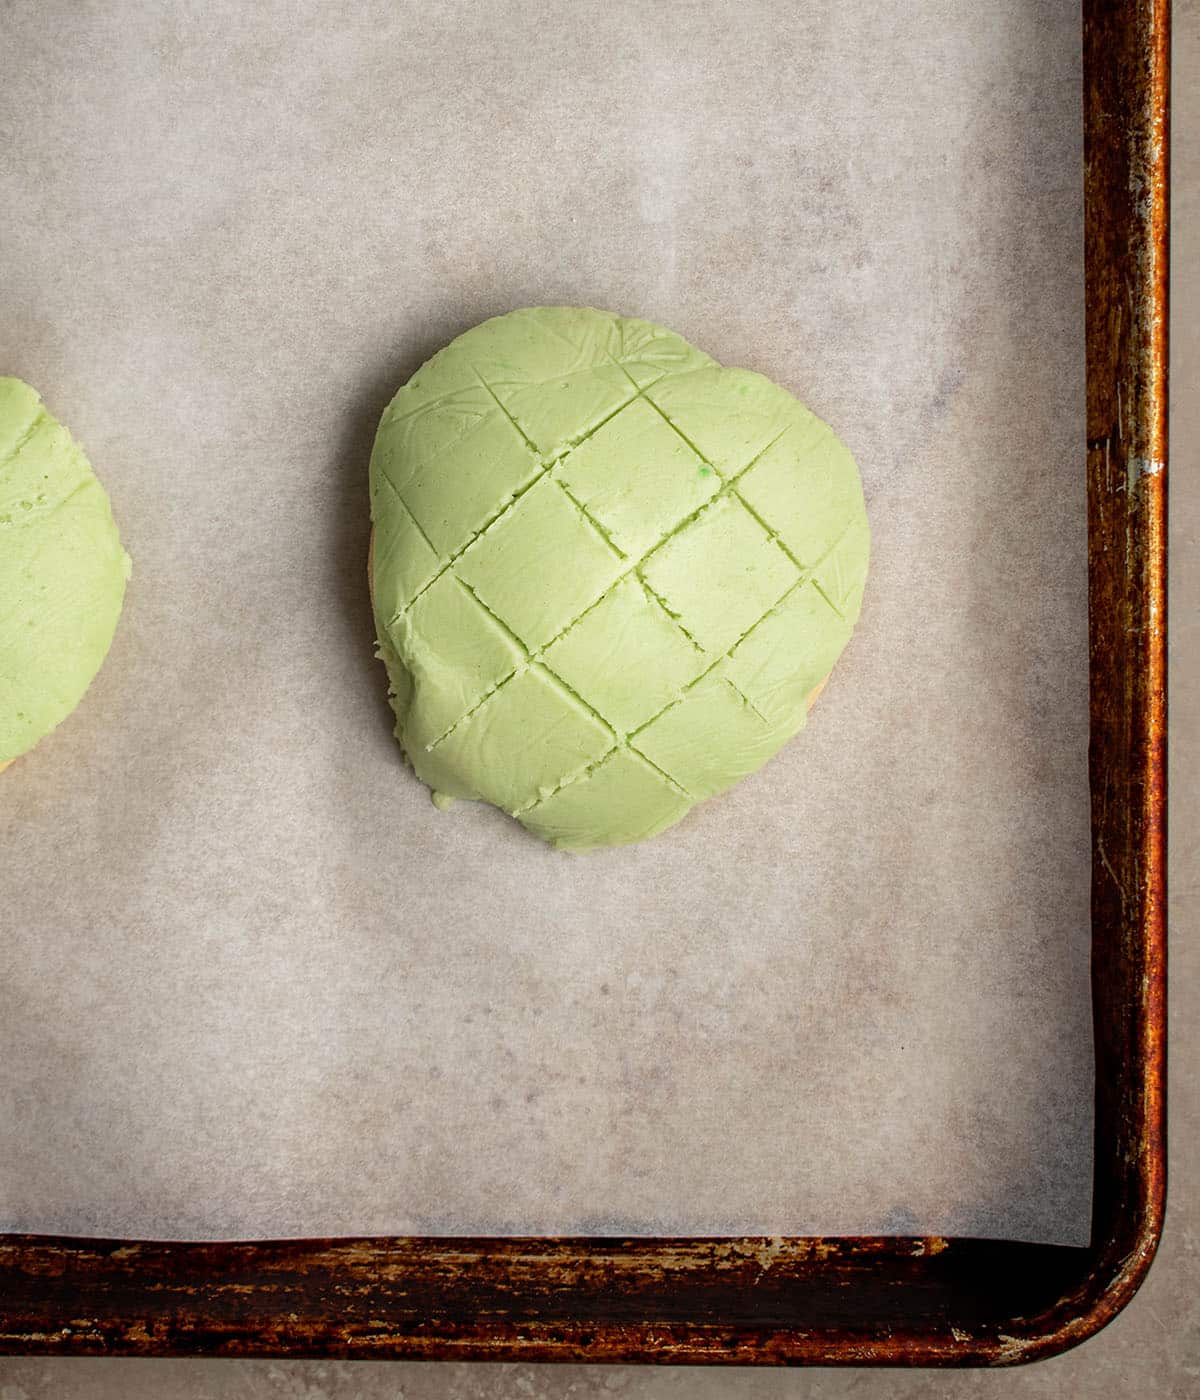
Are you still with me? Good because we're almost at the finish line. Cut the chilled bread topping into 8 portions and roll each into a circle big enough to cover the bread. If your kitchen is hot, you want to work quickly because the topping can get sticky when warm.
Score the tops in a crisscross pattern using a sharp knife. If you want to get clean lines, wipe the knife clean after every cut.
Bake the rolls for 10-12 minutes or until the bottoms are browned.
Phew, that was a lot of work! But I can happily say that these honeydew breads were very similar to the ones I had in Japan. The bread is incredibly soft, and the custard has the perfect amount of sweetness with a hint of honeydew. Now to try this with cantaloupe...
If you're a fan of melon desserts, be sure to check out these melon creamsicle bars and watermelon kiwi agua fresca!
Make-ahead and storage
- Make-ahead: You can make the honeydew syrup up to 3 days in advance and the honeydew custard up to 1 day in advance.
- Store: Let the honeydew bread cool completely and wrap it in plastic wrap or in an airtight container. The bread freezes well and can be kept in the freezer for up to 3 months.
Frequently asked questions
Yes, you can use frozen instead of fresh. Since frozen fruits tend to be less sweet, you may need to adjust the amount of sugar in both the syrup and custard.
Feel free to make it your own and try canteloupe, strawberry, or even pineapple!
More Asian bread recipes
Looking for more Asian bread ideas? Try these:


Recipe

Japanese Honeydew Bread
Ingredients
Honeydew syrup
- 2 cups ripe honeydew chunks (320 grams)
- ¼ cup granulated sugar (50 grams)
Dough
- 1 teaspoon active dry yeast (4 grams)
- 1 teaspoon granulated sugar
- ½ cup warm milk, between 100-110 degrees F (125 ml)
- 1 ¾ cups bread flour (260 grams)
- ½ teaspoon salt
- 2 tablespoons granulated sugar (25 grams)
- 2 tablespoons butter, softened at room temperature (28 grams)
- 1 large egg
Honeydew custard
- 1 ½ cups honeydew juice (about 2 ¼ cups, 360 grams, honeydew chunks)
- 4 large eggs
- ½ cup granulated sugar (100 grams)
- 2 tablespoons cornstarch (18 grams)
- 1 teaspoon vanilla extract
- ¼ cup honeydew syrup (80 grams)
Bread topping
- 5 tablespoons softened butter (70 grams)
- ⅓ cup granulated sugar (67 grams)
- 1 large egg
- 2 tablespoons honeydew syrup (40 grams)
- 1 ½ cups cake flour (180 grams)
- ½ teaspoon baking powder
- 1 drop green food coloring, optional
Instructions
- Make honeydew syrup. Puree 2 cups honeydew until smooth. Combine with sugar and bring to a boil over medium heat in a medium saucepot. Continue to cook until liquid is reduced by half, about 20 minutes. Remove from heat and cool completely.
- Prepare dough. Combine active dry yeast with 1 teaspoon sugar and warm milk. Let sit for 10 minutes or until yeast has been activated and mixture is foamy. Mix together yeast mixture with bread flour, salt, sugar, softened butter, and egg until dough comes together. Knead dough for 7-8 minutes or until smooth. Transfer dough to a clean bowl, cover with plastic wrap, and let rise in a warm area for 1 hour or until doubled in size.
- Meanwhile, make honeydew custard. Puree about 2 ¼ cups honeydew to make 1 ½ cups honeydew juice. Whisk together juice with eggs, sugar, cornstarch, vanilla, and ¼ cup honeydew syrup. Bring to a simmer over medium-low heat in a medium saucepot, whisking continuously. Continue to simmer until thickened, about 5-7 minutes. Remove from heat and transfer to a clean bowl. Place plastic wrap directly on top of the custard and let cool completely.
- Punch down dough and divide it into 8 even pieces. Shape each piece into a round ball and roll it out into a 6-inch circle. Fill the center of the dough with 3-4 tablespoons honeydew custard (add more custard if you can!) and gather up the edges to seal in the custard. Place seam side down on a lined baking sheet and continue with remaining dough. Loosely wrap the honeydew bread and let rise in a warm area for 1 hour.
- Meanwhile, make bread topping. Cream together softened butter with sugar until light and fluffy, about 2-3 minutes. Add egg and beat until combined. Add 2 tablespoons honeydew syrup, cake flour, baking powder, and green food coloring if using. Mix well until food coloring is well distributed. Shape dough into a log and chill in the fridge for at least 30 minutes or until firm.
- Preheat oven to 350 degrees F.
- Remove bread topping from fridge and slice into 8 pieces. Flatten each piece until it's big enough to cover top of the bread. Lay bread topping on top of rolls and score the top, making a crisscross pattern. Bake honeydew bread for 10-12 minutes or until the bottoms of the bread are browned. Let cool completely. Serve.


Carolyn JSD says
These are HEAVEN on Earth!!!! My 16 ur old made them Ho way Dew flavored first and they were not only relish but beautiful! Second time she made them cantaloupe flavored! Delish!!! Then she made strawberry flavored and they were so good too. Finally, we were attending a Celebration of Life ceremony and she wanted to make them. 177! She made Honey Dew, Strawberry and Fresh Peach from our garden!! It took her 16 hours but EVERYONE loved them!!! Thank you for sharing this phenomenal recipe and tips!!
Cherry on My Sundae says
Wow, your daughter did an amazing job and I can't believe she made all those flavors! I'm so glad they were such a hit!
Allie says
Just made these, cantaloupe flavored, and they are delicious! Very fun to make and overall nice, clear instructions.
The one part that was a bit confusing was wrapping the filling into the dough--I definitely did not have enough to make 8-inch circles, and unless your hand is enormous the picture makes it look like the circles are more like 4-5 inches and fairly thick. I tried both the biggest circle I could get (~6 inches and quite thin) and smaller and thicker like in the picture. The bigger, thinner one was much easier to seal up, while the smaller one was hard to close and was kind of a mess.
I also had way more custard than I could possibly use in 8 of these. I think I used less than half of it. So if I make these again I would either double the bread part or halve the custard. That said, extra custard isn't really a bad thing!
A few questions for next time:
1) is there any reason I shouldn't make parts of this recipe (syrup, custard, dough, topping) in advance and then assemble and bake?
2) How long do these keep in the fridge?
3) Can you freeze them?
Anyway, great recipe overall!
Cherry on My Sundae says
I'm so glad you enjoyed the bread! I always have leftover custard too but I find it just easier to make a bigger batch than a smaller one, but that's a personal thing. Plus I smear the leftover custard on some buttery toasted bread and it's pretty great! I adjusted the recipe to read "roll the dough into 6-inch circles," to make it easier for others to follow - thank you!
Here are the answers to your questions 1) You can absolutely make the syrup and custard 2-3 days in advance. The topping you can make the day before and just keep it in the fridge. 2) Like all bread, they won't keep very long. I would recommend keeping them for no more than 4 days. 3) Yes you can freeze them. I would wrap them up and freeze them once they cooled.
Twigs says
What to do with remaining custard???? Am lost
Denise says
Can’t wait to try these! I’m addicted to getting a melon pan and coffee every morning from Lawson when in Japan. Even the small villages sell them. These look so good! I have a lovely dead ripe melon to try it out!
Cherry on My Sundae says
I hope you like them! Let me know if you have any questions!
Nell says
Hey there! Beautiful recipe, my family was unexpectedly inundated with honeydew so can't wait to try! One question- for the custard, are we straining the puree to make clear juice or just adding it in with the pulp included? Thank you so much!
Christine Ma says
Hi! No need to strain it, I included the pulp - the texture still ends up smooth when the custard is finished!
Leanne says
Sometimes the lengths I go to so that I don't waste food...but this one was worth it! I got a huge bag of honeydew chunks given to me and I knew we couldn't get through it all fresh. I made the recipe as written except for bread flour I used all purpose. And for the cake flour I used the 1 cup all purpose = take out 2 Tbsp flour and replace with 2 Tbsp corn starch. They look just like the picture! Tastes great. Not a ton of honeydew flavor...just a hint. But I still felt good knowing it was in there and didn't go to waste.
Christine Ma says
I'm so glad they turned out well! Thanks for giving my recipe a try!
Anna Marie says
Such a great recipe! I followed the baking time but mine were still a little underbaked -- not sure what happened there, but next time will definitely make sure to leave them in longer if needed. When I put them into the tupperware they were totally soggy by the next day, but still tasted so good I'm going to go for round 2 with some of the strawberries I have frozen. Hopefully I can get it right this time! (100% baker error, I was making these at like 10pm so I was probably more than a little sleepy)
Christine Ma says
Thanks for giving my recipe a try! Ovens tend to differ in temperature so mine could be stronger than yours. A strawberry version sounds fantastic!
Sarah says
Hi, are you using salted or unsalted butter?
Christine Ma says
Hi there, I use unsalted butter!